Friday, May 5, 2017

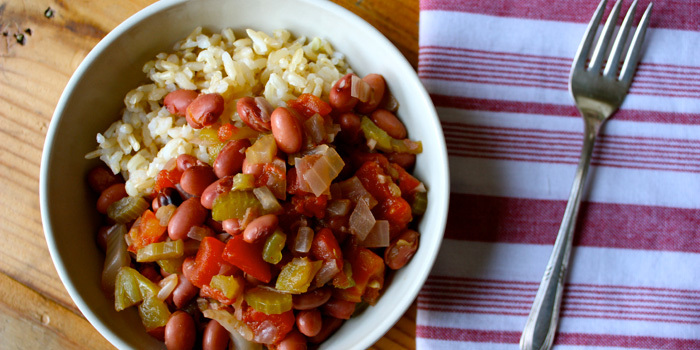
Savory Slow Cooker Beans with Rice

Savory-Beans-Rice
Let this savory bean dish cook all day and have dinner ready when you get home from work. If you want to skip the first step, you can soak dry beans overnight in a large pot of water. These beans get great flavor from celery, garlic, and diced green chiles.
Total Time: 11 hrs. 25 min.
Prep Time: 5 min.
Cooking Time: 10 hrs. 10 min.
Yield: 6 servings, about 1 cup of beans each
Ingredients:
1¼ cups dry red beans (or dry red kidney beans), rinsed
Water
1 medium onion, chopped
2 medium celery stalks, sliced
2 cloves garlic, finely chopped
1 tsp. dried basil, crushed
1 bay leaf
2 cups low-sodium organic vegetable broth
1 cups water
1 (14.5-oz.) can stewed tomatoes
1 (4-oz.) can diced green chiles, undrained
Hot sauce (like Tabasco) (to taste; optional)
3 cups cooked brown rice, warm
Preparation:
1. Place beans in large saucepan. Add enough water to cover beans by two inches. Bring to a boil over medium-high heat. Reduce heat; gently boil for 10 minutes. Remove from heat, cover, and let stand for one hour.
2. Place beans, onion, celery, garlic, basil, bay leaf, broth, water, and tomatoes in 4-quart slow cooker. Cover; cook on low heat for 9 to 10 hours (or on high heat for 4 to 5 hours), or until beans are tender.
3. Remove bay leaf. Add chiles and hot sauce (if desired); cook for an additional 30 minutes.
4. Place ½ cup rice in each of six serving bowls. Top evenly with bean mixture.
Nutritional Information (per serving):
Calories: 279
Total Fat: 1 g
Saturated Fat: 0 g
Cholesterol: 0 mg
Sodium: 281 mg
Carbohydrates: 55 g
Fiber: 10 g
Sugar: 5 g
Protein: 12 g
P90X/P90X2 Portions
1½ Vegetable
½ Tuber/Legume Carb
½ Grain Carb
P90X3 Portions
½ Protein
3 Carbs
Body Beast Portions
1 Vegetable
1 Protein
1 Legume
1 Starch
Containers
1 Green
2 Yellows

Thursday, May 4, 2017

Infused Water

What Are The Benefits of Infused Water?

Besides tasting great and having zero calories, a water detox has many additional health benefits, including:
  • Improves your mood.
  • Flushes toxins from your system.
  • Fills you up so you don’t eat as much junk.
  • Naturally helps your body release fat cells for water weight loss.
  • Keeps food moving through your system.
  • Keeps your organs healthy while you’re sweating.
  • Reduces muscle fatigue while working out.
  • Helps you recuperate faster from a workout.
  • Keeps you from feeling groggy in the afternoon.

Water and weight loss go hand in hand. Drinking water to lose weight and be healthier is one of the easiest habits you can have, especially when you can make so many types of  infused water recipes to choose from.

Drinking Water to Lose Weight

Studies have shown that drinking infused water may help improve weight loss and support long term weight loss maintenance. (2)
Drinking water increases the amount of calories you burn by as much as 24-30% within 10 minutes of drinking water, and this water weight loss increase can last for as long as 60 minutes! (3,4)
So if you want to lose weight fast without much extra effort, try drinking more water.

I found this great bit of info at lose weight by eating

Strawberry Lemon Basil Infused Water

Ingredients
Servings 1 5 (pitcher)
Water 2 5
Strawberries 2 8-10
Lemon  1/4 1
Basil Leaves 3-4 15


Directions:
Slice the strawberries and add to the bottom of your glass or pitcher. Pour in water and squeeze the lemon in as you place into the water. Tear the basil leaves and stir into the drink Enjoy

How to use the water recipes i will be posting

Most recipes include ingredient amounts for a single serving and a pitcher (about five servings). Note that some ingredients do not show a full five times more than the single serving. For example:  1 serving will get 1 cinnamon stick while 5 servings will get 4 cinnamon sticks.

This is because when you make a pitcher, we assume that you will only be pouring one or two glasses at a time. When you put the rest of the pitcher back in the fridge, it has more time to soak in the ingredients making the water more flavored. When preparing a full pitcher, you will want to remove any citrus fruits from the water after a few hours. Peels can cause the water to become bitter.

 Don’t worry about perfection!

When it comes to making the infused drinks, the amount of ingredients are not crucial. If a recipe calls for 5 strawberries but you only have 3 left, just use three! You can adapt these recipes to your liking and amount of ingredients you have on hand. You can also use the recipes as inspiration to mix, match and create make your own drink creations!


From: 78 SUGAR-FREE drinks to satisfy your cravings...naturally Copyright 2016 by Smart Diabetes Solutions

Bringing out the Flavor of infused water

Bringing Out Flavor

• Slice & Dice: The softer the fruit, the thicker you slice. The harder the fruit, the thinner you slice. This way you can get the most flavor and nutrients from the fruits you put in. Larger fruits like mangos can be diced.

• Squeeze: Squeeze citrus fruits to help release juices into the water.

• Muddle: ginger root, rosemary and lemongrass with a wooden spoon to release flavors. Muddle berries, mango, herbs to release flavors more quickly.

• Tear: Tear or crush leafy herbs like mint, basil and cilantro to release oils.

• Quick Flavor: Cucumbers, squeezed citrus fruits, melons, muddled berries and mint flavor water almost immediately.

• General Infused Flavor: As a general guideline, refrigerate your drink for2 hours to allow it to infuse.

• Overnight Flavor: Apples, cinnamon, fresh ginger root and rosemary, and any dense fruits need an overnight soak in the fridge in order to flavor the water well enough to taste.

• Avoid Waterlog: Melons and sliced strawberries start looking water logged after a few hours; citrus and whole berries look pretty good even after hours in the fridge.

• Avoid Bitterness: After four hours, un-peeled citrus can make water taste bitter. To make a big jug of infused water for a party, peel the citrus before soaking. Or you can soak it un-peeled for four hours, remove it, and add fresh slices for looks. (And keep that water icy cold for food safety.)

• Store for Later: If you don’t drink the water within 24 hours, strain out the solids and refrigerate for up to three days.

• Refills: To keep sipping all day long, refill your infused water container when it’s half full. It will be weaker than your first drink, but still flavorful.


From: 78 SUGAR-FREE drinks to satisfy your cravings...naturally Copyright 2016 by Smart Diabetes Solutions

blueberry baked oatmeal

blueberry baked oatmeal
INGREDIENTS
• 2 cups old fashioned rolled oats
• 1 teaspoon baking powder
• 1/2 tablespoon cinnamon
• 1 teaspoon nutmeg
• 2 cups water
• 1 cup low-fat milk or no sugar added nut milk
• 1 teaspoon vanilla extract
• 1/2 teaspoon stevia
• 2 whole large eggs
• 2 egg whites
• 2 cups fresh or frozen blueberries
• optional: 1/4 cup chopped
nuts for topping
DIRECTIONS
Preheat your oven to 350 degrees and spray a 9-inch square baking dish with nonstick cooking spray.
In a large mixing bowl, add oats, baking powder, cinnamon, and nutmeg and mix until
all ingredients are evenly distributed. Add all remaining ingredients exception blueberries and mix well. Gently fold in the blueberries and then pour your mixture into your greased baking dish. Transfer to your preheated oven and bake for 40 minutes. If the oatmeal still appears loose after 40 minutes, bake for another 5-10 minutes.
Allow to cool, top with optional nuts and enjoy!
Serves 4
This warm baked oatmeal is the perfect breakfast comfort food. Leftovers store
beautifully, so you can refridgerate, reheat and enjoy for several days. It can even be
enjoyed as a healthy dessert!
NUTRITION FACTS
Protein: 9.03 g
Fat: 5.55 g
Carbs: 50.57 g
Sugar: 12 g


Water Water Water

Before we dig into the recipes, here’s some quick tips for infusing water and simple ways to keep your water tasting great.
What Water Do I Use?
• Still Water: Filtered water, distilled water, spring water or mineral water are all great choices. Basically, try to avoid tap water as untreated tap water may contain unpleasant-tasting minerals. Avoid pre-flavored waters.
• Carbonated Water: Sparkling water, seltzer, soda water, or club soda are all great options. The only difference between them is the process used to create the carbonation. Just avoid any carbonated waters containing flavoring or sugars.
Prep Basics
• Container: Select your container. Glass is best. BPA-free durable plastic works as well. You can find water bottles with infusers in them too. You can use a pitcher to prepare several servings at once.
• Shop: Shop for organic fruits when easily accessible and affordable.
• Clean: Always wash all produce and herbs to remove chemicals, pesticides and other residues.
 
From: 78 SUGAR-FREE drinks to satisfy your cravings...naturally Copyright 2016 by Smart Diabetes Solutions


Wednesday, May 3, 2017

french toast oatmeal


french toast oatmeal

INGREDIENTS

• 2 cups water
• 1 cup old fashioned oats
• 1/2 cup liquid egg whites*
• 2 teaspoons cinnamon
• 1 teaspoon stevia (you may add more or less for taste)

DIRECTIONS

Add 2 cups of water to a small saucepan and bring to a boil. Once boiling, stir in oats, reduce heat to  low and cover.

Cook oats until all the water is absorbed, about 10 minutes. Once the oats are cooked, stir in the egg whites quickly so that they cook without clumping, this should take about 1 minute.

Stir in the cinnamon and stevia, spoon into two serving bowls and enjoy!

Note: This can also be made in advance, so to reheat simply stir in a drop of water, cover with
plastic wrap and microwave until warm.

*Note: If you are weary about adding egg white into your oatmeal, I can promise you that you
won’t even notice it. The egg whites will help provide you with a balanced meal and the protein
you need to sustain you until your mid-morning snack.

If you would prefer not to add egg whites to your oatmeal, you can cook it without it and enjoy it
with a side of two eggs cooked however you like.

NUTRITION FACTS
Protein: 15.42 g
Fat: 8.92 g
Carbs: 36.61 g
Sugar: 0.33 g

Wednesday, April 26, 2017

albondigas (mexican meatball soup) in the instant pot

albondigas (mexican meatball soup) in the instant pot
Prep Time:10 min Cook Time:20 min Total Time:30 min
Serves 6
Ingredients
  • Meatballs
  • 1 lb Lean Ground Beef (85-90%)
  • 2 cloves Garlic, chopped
  • 1/2 Onion, chopped
  • 1/2 Green Bell Pepper, chopped
  • 1 Egg
  • 1 Tbsp Oregano, dry
  • 1 tsp Chili Powder
  • 1/2 tsp Cumin
  • For the Albondigas Soup
  • 4 Carrots, chopped
  • 3 cloves Garlic, chopped
  • 1/2 Onion, chopped
  • 2 Tbsp Olive Oil
  • 1 can, 14.5 oz. Roasted Diced Tomatoes
  • 2 - 32 oz Organic Chicken Broth
  • 1 tsp Salt (or, more to taste)
  • Pepper (to taste)
  • 2/3 C. White Rice, uncooked
  • Cilantro, fresh (for garnish)
Instructions
  • 1
    In a bowl, add all of your meatball ingredients and mix well until everything is blended thoroughly. Form meatballs about 1 1/2 inch in diameter -- you should get at least 16-18 depending on what size you make them. Put in the fridge for 5 minutes while you prepare the soup ingredients.
  • 2
    In your Instant Pot, turn on the Saute function and add the 2 Tbsp Olive Oil. Throw in the Onions and Garlic and saute until translucent. Add the carrots and tomatoes. Turn OFF the saute function.
  • 3
    Pour in the broth and rice, then gently place the meatballs in the Instant Pot, one at a time.
  • 4
    Put the top on the Instant Pot and lock in place. Push Manual (high) for 10 minutes. Once the timer beeps, let it release manually for 6-8 minutes - then turn the pot to OFF.
  • 5
    Open the lid carefully and add the salt & pepper to taste.
  • 6
    Ladle into bowls and serve with lime, and garnish with cilantro if desired.
got the recipe here

Tuesday, April 25, 2017

22 foods to Avoid


The good news is you can indulge in your favorite foods and still eat healthfully with our satisfying and delicious alternatives. Eating with diabetes doesn’t have to mean deprivation, starvation, or bland and boring foods. However, some foods really are best left on the table or in the store. Everyone—with diabetes or without—would be wise to avoid or limit the foods on this list because they are high in saturated fat, sodium, calories, or carbs, or might contain trans fats. High amounts of sodium and saturated fat can lead to heart disease, while excess sugars, high carb counts, and added calories can cause unwanted weight gain and blood sugar spikes. If you see some of your favorite foods on this list, don’t despair:


1. High-Fat Nachos
Skip the appetizers at your favorite restaurant and make a healthier at-home version for a full meal instead. Use reduced-fat cheeses and baked tortilla chips

 2. Biscuits & Gravy
High in calories, sodium, and fat (particularly saturated fat), traditional biscuits and gravy have more than earned their place on the naughty list  

3. coffee drinks
Stay away from sugary coffee drinks and opt for a simple cup of joe with a little milk or half-and-half.

4. Fruit Juice with Added Sugars
Fruit beverages can sneak extra calories and sugar into your diet, so reading labels is essential to making good decisions. Choose a low-calorie juice drink instead, and be aware of how many servings are in one bottle.

5. High-Carb Cinnamon Rolls
Doughy, sticky, and drizzled with sugary icing, cinnamon rolls are the culprit of many a diet violation. Even a homemade cinnamon roll can be over the top, and a typical “mall” roll contains more than 800 calories and 120 grams of carb. Tweak the ingredient list to include more healthful options, such as rolled oats and whole grain or whole wheat flour.

6. Calorie- Loaded Asian Entrées
 While some Asian chicken dishes are great choices, pass on items such as deep fried orange chicken with white rice. This dish typically comes without vegetables and weighs in at more than 400 calories and 43 grams of carb per serving—and that’s without the steamed white rice. Opt instead for plain, unbreaded chicken with a thin sauce, steamed brown rice, and lots of veggies.

 7. high-sodium battered-fish dinners
Fish isn’t always a safe choice for managing weight and diabetes, especially when it’s breaded and accompanied by fries. Make it your goal to fill half your plate with non-starchy veggies, a quarter of your plate with a starch, and the remaining quarter with meat or another protein source.

8. Fast-Food Fries
A restaurant order of french fries is loaded with saturated fat, sodium, and calories. Curb your craving with a more nutritious alternative, such as Oven-Roasted Fries

9. Fried foods
Fried chicken is another all-time favorite comfort food. Frying the chicken adds significant carbs, calories, sodium, and fat—it turns a good protein choice into a healthy-meal deal breaker.

10. High-Carb Cookies
That store-bought cookie studded with sprinkles or chocolate chips could be hiding trans fats. Instead of purchasing them, bake cookies at home.

11. Smoothies with Hidden Sugars
Don’t be fooled by fruit smoothies: Though they may seem like a healthy choice, they are usually filled with added sugar and sold in extra-large portions.

12. Sodium-Loaded Lunch Meat
A simple sandwich is a safe and healthy lunch choice, right? Not necessarily. Processed lunch meat can be full of sodium, so it’s important to read the nutrition labels or ask a deli attendant. Try slicing meat you’ve roasted at home.

13. fatty restaurant hamburgers
Saturated fat is the leading factor in high cholesterol levels, and you guessed it: Big, juicy cheeseburgers are full of saturated fat. That doesn’t mean you need to cut out saturated fat altogether. Just limit it to 7 percent of your total daily calories.

 14. high-fat purchased pie
Before you order dessert, remember that one slice of French silk pie can pack up to 650 calories, 46 grams of fat, and 52 grams of carb at a restaurant like Village Inn. You’re not safe buying a frozen pie, either, unless you have checked the label

 15. Fatty Frozen Meals
The convenience of make-in-minutes frozen meals, such as pot pies, doesn’t make up for their high sodium and fat contents. Try choosing frozen meals with fewer than 400 calories, 4 grams of saturated fat, and 600 milligrams of sodium. And before cooking, toss some frozen vegetables on top of the meal to make it more nutritious.

16. High-calorie treats
Think twice before taking a bite out of that commercially made pastry, such as a doughnut or muffin. These tempting treats come at a price, with high calorie, sugar, and fat contents, plus some contain trans fats. Look for fat-free, sugar-free, or reduced-sugar varieties.

17. High-Carb Beverages
Surprisingly, flavored waters are a top offender for people with diabetes—these beverages are often high in
sugar and carbs. What’s worse, many are sold in 20-ounce bottles. This translates to 2.5 servings, meaning if you drink the whole thing, you get close to triple the sugar, calories and carbs. Go for the VitaminWater Zero line— the drinks have 0 calories, 7 grams of carb or less, and 0 grams of sugar.

 18. Sugary Soda Drinks
Pop or soda: However you say it, these sugar-laden drinks can derail your healthy meal plan and spike blood sugar levels. Every 4 grams of sugar equals 1 teaspoon, so if your drink has 30 grams of sugar, that’s equal to consuming 7.5 teaspoons of sugar! These beverages add calories and carbs and may cause weight gain. healthier alternatives, such as sparkling water with fruit.

 19.High-Sodium Frozen Pizza
Frozen pizza is convenient and delicious, but many varieties are also full of sodium and calories that can blow a meal plan in one slice. Buy a thin-crust veggie pizza instead, or doctor up a plain one with fresh herbs and your own veggies.

.20. Cakes with Trans fats
Having diabetes doesn’t mean you have to bid farewell to desserts, but it is true that some are better choices than others. Many commercially baked cakes contain trans fats, which can lead to high cholesterol and risk of cardiovascular disease. Portion and moderation are the keys.

21. Sugar-Loaded Milk Shakes
It’s no surprise that rich, thick milk shakes are loaded with sugar and calories, but they also could be hiding trans fats. Top it off with whipped cream and you only add more calories. Don’t despair:

22. High-calorie restaurant pizza
Restaurant pizza is better than frozen pizza, right? Wrong. These high-calorie pies can be just as bad as the heat-at-home frozen varieties. Tip: Cut sodium, fat, and calories by choosing a thin-crust pizza with veggies or lean meats like ham or chicken. And although it’s tough, resist extra cheese.

 Want healthier options you can check: here

Chicken Alfredo

Got the recipe here


PhotoGrid_1456640112747
Ingredients:
  • 2 chicken breasts cubed( I always use frozen, because I never plan ahead!)
  • 12 ounce bag of egg noodles
  • 2 tbs butter
  • jar of alfredo sauce or you can make your own (1 cup of whipping cream, 1 tsp garlic, 2 tbs butter, 1 cup of grated Parmesan cheese)
  • parsley flakes
  • 3 cups of chicken broth
2016-02-28 00.10.33
Instructions:

  1. In the instant pot, place the noodles, chicken broth, 2 tbs butter and frozen cubed chicken. Fasten lid, then push manual button and set to ten minutes. I often will place the liquid in first and push the saute button to warm the fluid while I get the ingredients together. This saves time on the pot coming to pressure.  It will take a few minutes to come to pressure. While I am waiting for pressure and ten minutes to count down, I make the alfredo sauce if I don’t have any in the pantry.
  2. Alfredo sauce- In a small pan, melt butter in pan adding 1 cup of whipping cream and simmer for 5 minutes. Add garlic and parmesan  cheese and whisk, heating through. Add parsley.
  3. When the timer beeps on the pressure cooker, open lid and stir noodles and chicken. Add alfredo sauce and stir! Sprinkle parsley flakes on top!

And there you have it, fresh chicken alfredo in less than twenty minutes! The kids and hubby were very happy with dinner tonight!  Amazing and fast! hope you enjoy!  Subscribe to my blog and share with your friends!

Monday, April 24, 2017

How To Make Tomato Paste

the sloppy joe receipe calls for tomato paste so in an effort for clean eating I researched a homemade tomato paste :) it keeps in the freezer for 9 months - I think that I am going to give this a whirl.
Grabbed this from http://www.thekitchn.com/how-to-make-tomato-paste-cooking-lessons-from-the-kitchn-206853

How To Make Tomato Paste

Makes 20 to 24 ounces
What You Need
Ingredients
10 pounds tomatoes (See Recipe Note)
2 tablespoons olive oil
2 teaspoons sea salt
1/2 teaspoon citric acid
Equipment
Chef's knife
Cutting board
Large saucepan
Food mill, sieve, or chinois

Instructions

  1. Preheat the oven to 350°F.
  2. Chop tomatoes into quarters.
  3. Simmer the tomatoes with the olive oil: Combine the chopped tomatoes and olive oil in a large saucepan. Bring to a simmer. Cook until the tomatoes are soft and the peels begin to detach from the tomato flesh.
  4. Pass the tomatoes through a food mill: Push the warm tomatoes through a food mill, sieve or chinois to separate the tomato pulp from the seeds and skins. Stir the sea salt and citric acid into the pulp. Discard or compost the seeds and skins.
  5. Divide the tomato pulp between two large, rimmed baking sheets. You can also use a large roasting pan, but it will take longer to cook down that way.
  6. Bake the tomato pulp until reduced to a paste: Place the baking sheets in the oven. Check the tomatoes every half hour, stirring the paste and switching the position of the baking sheets so that they reduce evenly. Over time, the paste will start to reduce to the point where it doesn’t fill the baking sheet any more. At this point, combine the contents of the two pans into and continue to bake.
  7. The paste is done when shiny and brick-colored, and it has reduced by more than half (3 to 4 hours). There shouldn’t be any remaining water or moisture separating from the paste at this point. This will take 3 to 4 hours, though exact baking times will depend on the juiciness of your tomatoes.
  8. Divide finished paste into 4-ounce jars, leaving 3/4 inch headspace.
  9. Preserving Option 1 — Process the tomato paste in a hot water bath: Apply lids and rings and process in a boiling water bath for 15 minutes.
  10. Preserving Option 2 - Refrigerate or Freeze: If you don’t want to process the paste, you can refrigerate or freeze it instead. Scrape finished paste into clean half or quarter pint jars. Top each jar with a layer of olive oil and place in either the refrigerator or the freezer. As long as you keep it well-covered with olive oil and ensure that you only use a very clean spoon to remove it from the jar, it will keep in the fridge for 3 to 4 weeks. Frozen, it will keep for up to nine months.

Recipe Notes

  • Use paste tomatoes, like Romas and San Marzanos, for the greatest yield. Juicy heirloom tomatoes can also be used, but will have a smaller yield.

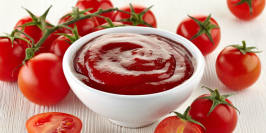
Ketchup - 21 day fix approved


So the sloppy joe recipe calls for ketchup I was researching what container to put this item in as part of my 21 day fix program, ketchup from the store is a YELLOW I don't want to give up a yellow container so I began a search and look what I found

Store-bought ketchup can have hidden sugar, salt and preservatives. Making your own from scratch is easy and delicious.
 Now it counts as a 1/2 of a green container
Ketchup
 Servings: 10 — Serving Size: 2 Tbsp  — 1 serving

 
Prep time
Cook time
Total time
 
Author:
Recipe type: Condiment
Serves: 10 servings, about 2 Tbsp. each
Ingredients
  • 1 (15-oz.) can organic tomato sauce, no salt or sugar added
  • 1 Tbsp. cider vinegar
  • 1 Tbsp. coconut sugar (or pure maple syrup)
Instructions
  1. Heat tomato sauce, vinegar, and sugar in small saucepan over medium heat. Bring to a boil, stirring frequently, for 5 minutes or until mixture begins to thicken. Remove from heat; cover. Cool to room temperature.
  2. Refrigerate, covered, for at least 2 hours.
 

Instant Pot Sloppy Joes

I am so going to try this!
 
Ingredients
 
1 lb ground beef
1/2 large onion, chopped
4 garlic cloves, minced
1/2 cup ketchup
2/3 cup chopped green bell pepper
1/2 cup celery, chopped
2/3 tablespoon brown sugar
1 tablespoon tomato paste
2 tablespoons prepared mustard
1 tablespoons cider vinegar
2 tablespoons Worcestershire sauce
1/2 tablespoon chili powder
Instructions
  1. Turn Instant Pot on to satue. In a small bowl mix togther, ketchup, brown sugar, tomato paste, mustard, vinegar, and Worcestershire then set aside.
  2. When Instant Pot is hot, add in hamburger and garlic.
  3. Cook until meat starts to brown then drain fat.
  4. Add meat back into the pot. Add celery, peppers, and onion. Cook for 1-2 minutes until fragrant.
  5. Turn Instant Pot off and add ketchup mixture.
  6. Cook on manual high pressure for 7 minutes. Quick release when the timer is up.
  7. Give everything a nice stir then serve on buns.
Notes
If you plan on using frozen meat, cook on manual high pressure for 7 minutes then quick release. Chop meat up with spatula (because it will be cooked in chucks) and place back under pressure to finish cooking for 7 minutes. Quick release when the time is up.
 

Sunday, April 23, 2017

Emotional Eating - Am I Really Hungry?


Ask yourself these questions to decide if you are responding to physical hunger or some
 
emotional need:
 
• Did the urge to eat happen suddenly? Physical hunger actually builds gradually through time.
 
• Will only one certain food do? Emotional hunger often “shouts” for chocolate or a bag of chips in a loud, clear voice. Veggies will not do!
 
• Did you realize you ate the whole thing? You grabbed the food, and it was gone before you even had a chance to savor it.
 
• Are you stuffed but still want more? Physical hunger senses when the stomach is full. Emotional hunger does not.
 
• Do you feel guilty, ashamed or sorry about the choice? Sometimes emotional eaters feel worse when they realize that their food choices didn’t change their feelings (or the situation that caused uncomfortable feelings in the first place). They may become more sad, stressed or angry
than they were before.
 
 
Ways to stop emotional eating
Throughout our lives, we learn that eating can give us something to do, provide a pleasant social setting, help us avoid addressing unpleasant feelings, provide a reward, recall a cherished memory or alleviate stress.
 
1. Take time to journal what you were feeling when you chose to eat when you weren’t physically hungry.
 
2. Figure out how to feed your feelings without food. Knowing what is eating you is just as important as knowing what and how much you should be eating.  Exercise to release tension and to feel both calm and energized.  Soothe yourself with a soak in the tub or a cup of tea.  Take a break to read a book, watch a favorite show or enjoy a hobby.
 
3. Stop and count to 10. Minutes, that is. Emotional eating is often a matter of habit and happens without any real thought. Give yourself the time to think about the reason you want  to eat. Delay can lead to understanding and a different choice. Try to picture yourself effectively managing this.  Pause a few minutes before you choose to eat if you suddenly have a craving. Forgive yourself if you decide to go ahead and eat. Learn all you can from the choice and move on.
 
4. Surround yourself with support. Seek out and build relationships with positive people who will enrich your efforts to live your best life. Reach out to a friend or member of your chapter. A concerned but independent listener will 
help restore your perspective and allow you to express your feelings.
 
 5. Be your own best friend. Make it a priority to build healthy habits that keep you strong, rested and relaxed. Aim for 7 to 8 hours of sleep each night. It actually helps reduce food cravings. Take a walk when you are feeling stressed.
 
Schedule 15 minutes of “me time” to relax and restore your balance.
 
I have printed this worksheet for me to work on :)
 

Saturday, April 22, 2017

My Plate

MyPlate, unveiled in June 2011 by the United States Department of Agriculture (USDA), replaces the 20-year-old food pyramid, which the USDA said was too confusing for consumers. Size of the plate and size of the portions are, of course, very important.


The MyPlate icon gives us a visual reminder to fill half of our plate with fruits and vegetables, something TOPS has advocated for years. It’s as simple as that. The remainder of our plate should include lean protein and grains—preferably whole grains such as brown rice or whole-wheat pasta. Pair your plate with a side of low-fat dairy such as skim milk, and you have a balanced, nutritious meal.

To learn more about MyPlate, visit www.choosemyplate.gov. To help you build healthier meals, Try to use MyPlate as the basis for your main meal each day as a simple way to get started.
 
The colors for my plate are similar to the 21 day fix
 
  • 1 Green Container : For Vegetables.
  • 1 Purple Container : For Fruits.
  • 1 Red Container : For Proteins.
  • 1Yellow Container : For Carbohydrates.
  • 1 Blue Container : For Healthy Fats and Cheeses.
  • 2 Orange Containers: Seeds and dressings.
  •  

    Friday, April 21, 2017

    T.O.P.S. - taking off pounds sensibly

    Well, it has come to this - I have joined a group 2/7/2017 at 203.4 pounds
    that makes me accountable for my weight loss journey.

    I joined TOPS
    This is a brief description on the website:

    Are you ready to stop dieting and start making real changes? TOPS can help you reach your weight-loss goals by providing you with the tools, information, support, and accountability you need to be successful. After all, this has been a winning formula for TOPS members just like you over the last 60-some years.

    Weekly meetings can help you take an honest look at the changes you need to make, show you that true health isn't a certain pants size, or even a number on a scale, and help you appreciate who you are on the inside and the outside right now.

    What TOPS can't do for you
    TOPS can't do the work for you. You only get out of TOPS what you put into it. We can't guarantee weight loss just by attending meetings, but we can offer support through each stage of the journey, including after you reach your goal weight.

    With 2 months under my belt I am still weighing in at 203.4 I lose then I gain I lose then I gain so for the next 21 days I am going to do the 21 day fix program and hopefully quit messing around with these 3 pounds and lose it for good

    Thursday, April 20, 2017

    Instant Pot Homemade Cottage Cheese Recipe


    Instant Pot Homemade Cottage Cheese Recipe
    Prep Time 15 mins
    Instant Pot Homemade Cottage CheeseCook Time 45 mins
    Total Time 1 hrs
     
    This Instant Pot Homemade Cottage Cheese Recipe is so quick and easy.  In under two hours, you will have delicious Homemade Cottage Cheese.
    Servings: 1 Quart
     
    Ingredients
     
    Instructions
    1. Pour milk into Instant Pot cooking pot and cover with Glass Lid or Black IP Lid. 
    2. Push the Yogurt button and then the Adjust button.  The display should read "Boil."  During the Boil cycle, remove the lid and whisk the milk a couple of times during the cycle.
    3. When Beep sounds, remove lid and take temperature..  Anywhere from 170-180 degrees is fine.   Slowly pour in the vinegar and gently move around the milk.   It will begin to look curdled.  Turn off the Instant Pot.  Cover the milk with the Glass Lid and let sit for at least 30 minutes.
    4. Add Salt to the Cream and Whisk together.  Set aside.
    5. Pour the Cottage Cheese into a Strainer Basket, sitting inside of a Cooking Pot or other device to catch the Whey.  Remove Strainer Basket to sink and run a slow stream of cool water over the Strainer Basket to remove excess Vinegar.  Place Cottage Cheese into bowl.  Pour Salt/Cream into bowl and gently incorporate.
    6. Refrigerate and enjoy.
    7.  
    https://thisoldgal.com/instant-pot-homemade-cottage-cheese-recipe/